Related:
Check out and check in equipment
Self-service mode
Self-service mode lets you perform equipment check-in, checkout and edit personal profile on your own.
Identify yourself
On the first time you use the new Onix Tool Store, you enter self-service mode by default. If you’re in the served mode and want to switch: Open the Menu from the top left > Select Sign out.
To identify yourself, choose the suitable identification method, and then enter the PIN or password (if required).
If you have not got an account in Onix system, select Email and follow the on-screen instructions to create a new Onix Tool Store user account.

Check out equipment
To check out equipment:
- In the action list, select Check out
- Add equipment to cart by scanning or searching from the list of equipment.
- For stock and consumable equipment, enter the number of items to be checked out.
- Select Continue after you’ve done adding equipment to cart
- Enter the expected return date and place to be used > Continue.
- Review and edit additional information if needed.
- Select Continue to complete the checkout.
While checking out, you can tap on any equipment to view its details or remove it from the cart.
Important note: Equipment cannot be checked out if it has one of these conditions:
- Have at least one NC issue
- Have at least one overdue RC issue
- Have at least one overdue mandatory inspection


Check in equipment and create issue
To check in equipment:
- In the action list, select Check in
- Add equipment to cart by scanning or searching from the list of equipment.
- Select Confirm to complete the check-in.
While checking in, you can tap on any equipment to view its details or remove it from the cart.
To create issues when you check in equipment:
- Tap on the equipment > Create new issue.
- Fill in the issue details > Save.

Edit profile
In self-service mode, you can edit your own profile by selecting Edit profile from the action list.

Served mode
Enter served mode and select user
In the served mode, you become an operator who can do equipment check-in or checkout on behalf of another employee, manage other users’ profiles and configure scanners.
Requirements:
- Have an active Onix Work user account in your company.
- Be assigned a role and license that enables the “Manage devices” privilege at “Full access” level.
To enter the served mode and select a user:
- Select the menu on the header > Switch to Served mode.
- Log into your Onix Work account.
- At the User selection screen, search and select a user by scanning their ID card, or inputting their information in the search box.
If you need to create a new Onix Tool Store user: Select the + button on the header’s top right > Enter relevant information > Save.

Check out and check in equipment
- Add equipment to the cart. You can do this by scanning or typing in the search box.
- Choose the correct checkout or check-in action for each item.
- Enter the additional information: Return date, Place to be used, and Comment.
- For stock and consumable goods, enter the quantity to be checked out.
- When all changes are complete, select Complete.
While searching for equipment, you can switch between equipment views to expand or narrow your search results.
You can also create issues for checked-in equipment by selecting the three-dot menu > Create new issue.

Important note: Equipment cannot be checked out if it has:
- NC issue(s), or
- Overdue RC issue(s), or
- Overdue mandatory inspection.
Settings
Configure and test scanners
You can only configure and test scanners in the served mode.
- Tap on the hamburger icon on the top left > Select Settings.
- For Scanner configuration settings: connect or disconnect scanners and adjust their sensitivity.
- For Test scanner settings: Scan to ensure your scanner is working properly.
Edit user profiles
In the self-service mode, you can edit your own profile. In the served mode, you can edit the profile of other users at your company.
Do this by selecting Edit profile from the action list of both modes.
Send and receive equipment in projects
Send equipment
Unique equipment
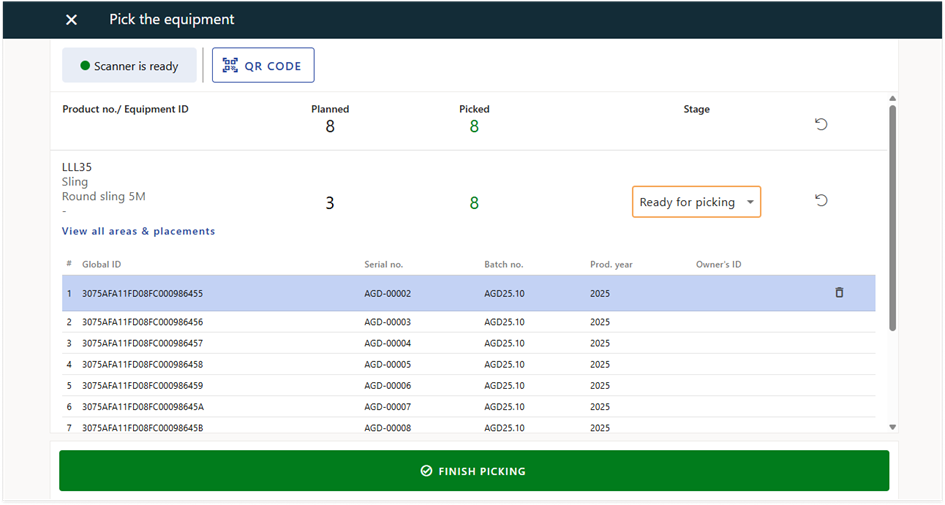
Scan equipment to deliver items as planned in projects.
- In Onix Tool Store, choose an identification method to authenticate yourself.
- Select Send > Select a project and view the list of open requests.

- Select a single request or select the Scan button and select multiple requests.
- Start scanning.
- Scanned equipment is automatically identified and sorted into the relevant request.
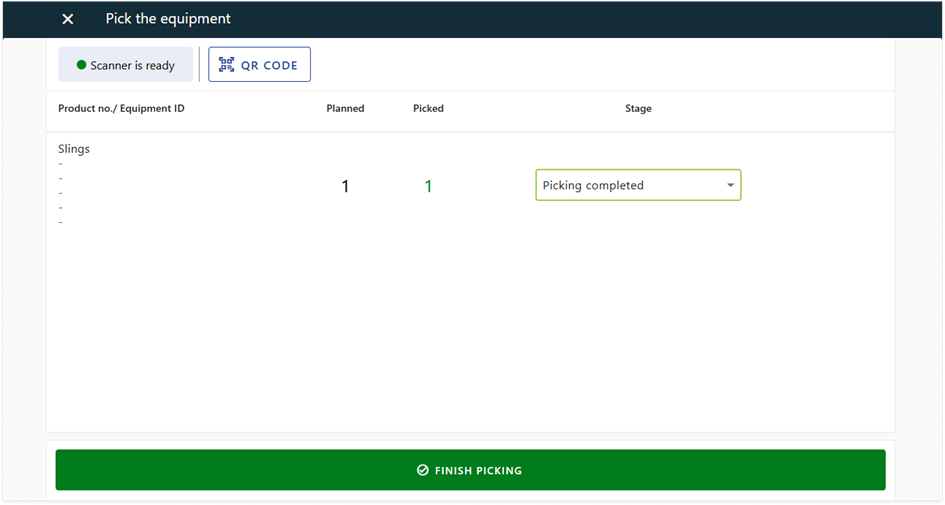
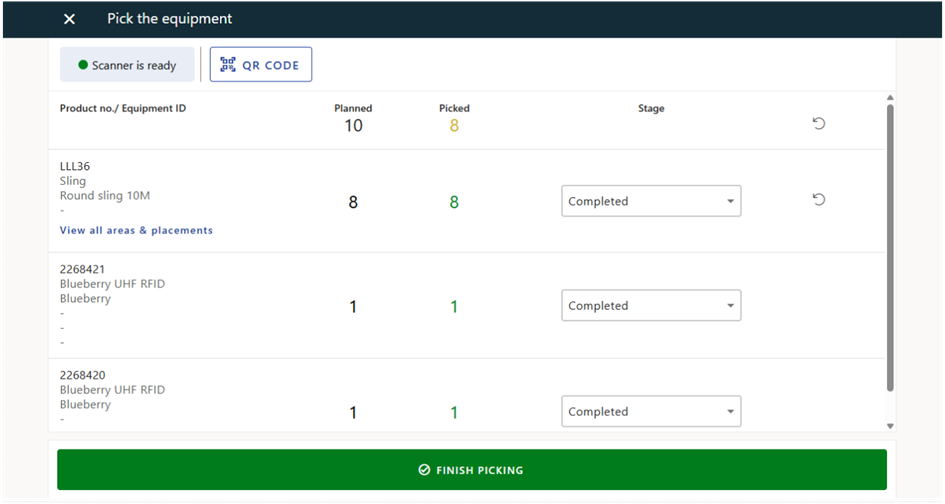
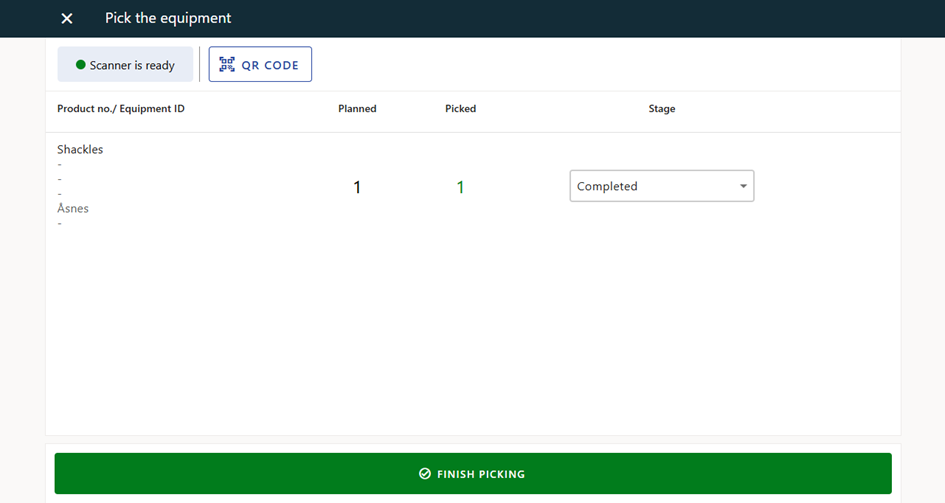
- As soon as the picked quantity reaches the planned quantity, the request stage updates automatically to indicate that picking is complete.
- When finished, select Finish picking.
While sending, you can:
- Update a request stage manually.
- View where equipment of a product locates: Select View all areas and placements at each request.
- Remove a scanned equipment: Select the request > Select the item > Remove.
- Reset the picking of product requests: Select Reset for one or all requests.
Stock and consumable goods
Enter the quantity of stock and consumable goods to be used in the project.
- In Onix Tool Store, choose an identification method to authenticate yourself.
- Select Send > Select a project and view the list of open requests.
- Select a single request or select the Scan button and select multiple requests.
- Enter the actual quantity of stock or consumable goods to be sent. When the picked quantity reaches the planned quantity, the request stage updates automatically to indicate that picking is complete.
- When finished, select Finish picking.

Equipment groups
Scan or select requests for equipment groups to be used in the project.
- In Onix Tool Store, choose an identification method to authenticate yourself.
- Select Send > Select a project and view the list of open requests.
- Select a single request or select the Scan button and select multiple requests.
- Update the request manually or start scanning so the request stage updates automatically.
- When finished, select Finish picking.
Receive equipment for one project
Unique equipment
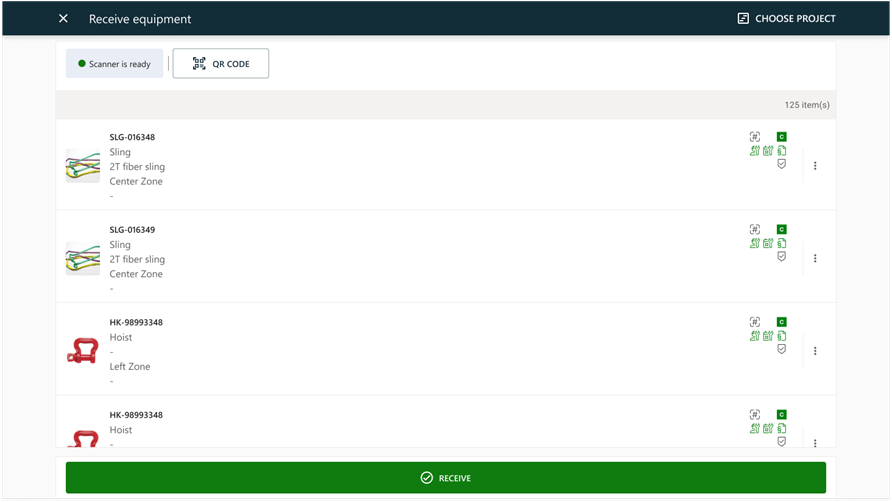
Scan to receive unique equipment of a project.
- In Onix Tool Store, choose an identification method to authenticate yourself.
- Select Receive > Choose project if you’re not yet in this mode.
- Select a project and view the list of open requests.
- Select a single request or select the Scan button and select multiple requests.
- Select equipment by scanning or manually select equipment. Scanned equipment is automatically identified and sorted into the relevant request.
- When finished, select Finish picking.
As soon as the picked quantity reaches the planned quantity, the request stage updates automatically to indicate that picking is complete.
While receiving, you can:
- Update a request stage manually.
- Remove a scanned equipment: Select the request > Select the item > Remove.
- Reset the picking of one or all product requests.
Stock and consumable goods
Enter the quantity of stock and consumable goods to be received in the project.
- In Onix Tool Store, choose an identification method to authenticate yourself.
- Select Receive > Choose project if you’re not yet in this mode.
- Select a project and view the list of open requests.
- Select a single request or select the Scan button and select multiple requests.
- Enter the actual quantity of stock or consumable goods to be received. When the picked quantity reaches the planned quantity, the request stage updates automatically to indicate that request is completed.
- When finished, select Finish picking.

Equipment groups
Scan or select requests for equipment groups to be received in the project.
- In Onix Tool Store, choose an identification method to authenticate yourself.
- Select Receive > Choose project if you’re not yet in this mode.
- Select a project and view the list of open requests.
- Select a single request or select the Scan button and select multiple requests.
- Update the request manually or start scanning so the request stage updates automatically.
- When finished, select Finish picking.
Bulk receive equipment for multiple projects
Scan to receive unique equipment for multiple projects at once.
- In Onix Tool Store, choose an identification method to authenticate yourself.
- Select Receive > Bulk receive if you’re not yet in this mode.
- Start scanning. Scanned equipment is automatically identified and sorted into the relevant request.
- When finished, select Receive.
While bulk receiving, you can:
- Remove a scanned equipment: Select the 3-dot button of each item > Select Remove.
- Create issue: Select the 3-dot button of an item > Select New issue.
- View the equipment details and history: Select the 3-dot button of an item > Select View equipment details.